Wednesday, June 16, 2010

Avon's Simply Pretty Pressed Powder***

Its a part of my everyday routine to apply my pressed powder (or in other cases, foundation). I've been on the search for the perfect pressed powder, and so i think i found it (for the mean time). So for this post i present you with Avon's Simply Pretty Pressed Powder!


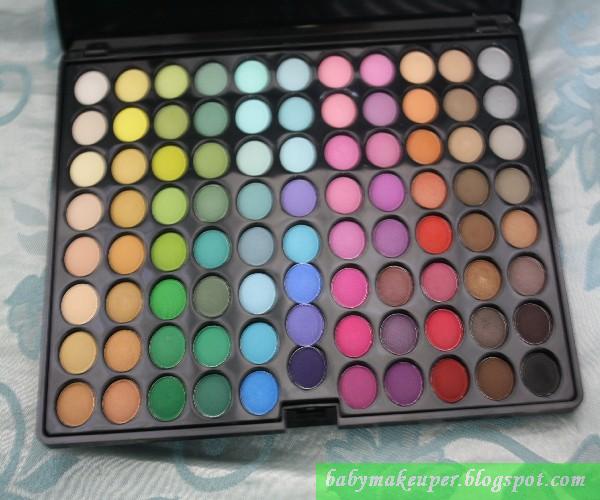
Cover Case of The Pressed Powder

Avon Says:
Put shine on hold while keeping your face fresh and protected! With special micro powders to absorb shine and blend evenly and smoothly for that fresh, clean look. Also contains SPF14 that helps shield skin from damaging UVA/UVB rays.This product is Oil-free and dermatologist tested. Clinically tested, non-comedogenic and non-acnegenic. Made specially for Asian women.

Likes
:
  • it does keep the face matte
  • contains SPF14 for extra protection
  • very natural looking
  • does not cake out my liquid foundation
  • application is a breeze using my kabuki brush
  • does not cause me break-outs
  • has micro-powders that melts on your face and help in blending with it
  • dermatologist and clinically tested
  • cute and simple packaging
  • not messy at all
  • comes with a sponge/applicator (which i find useless.. no offense Ü)
  • non-comedogenic and non-acnegenic
  • locally available
  • inexpensive
Dislikes:
  • after two hours or so, retouch is needed
  • cracks easily if dropped (i think every pressed powder does. hahaha! Ü)
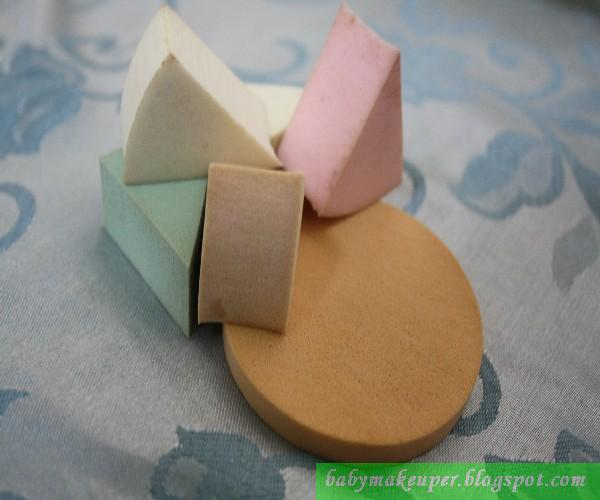
Avon's Pressed Powder With its Applicator

I Say
:
I really like this product, this actually reminds me of my maybelline pressed powder. The very thing that i liked about this product is that its very natural looking and it does mattifie my face. For an inexpensive product, this is one of the must-haves that should be kept in one's stash. This pressed powder is so amazing that i can't leave this sleeping in my room, i carry this everytime as i need to retouch every 3 or 4 hours. So overall, i recommend this product to you specially if you are still a student like me, i mean lets face it, not everyone can afford MAC with our won allowances right? hahaha! So go for it girls!

Saturday, June 12, 2010

Coastal Scents 88 Matte Palette***

I was never a fan of eyeshadows, nor was i fond of putting on or collecting eye make-up. But when i saw this thing on ebay, everything changed! I started watching tutorials and lessons on youtube about eye make-up. So for this post, i present you, my Coastal Scents 88 Matte Palette!

Coastal Scents 88 Matte Palette

According to a lot of reviews on blogs and on youtube, this palette is a superstar and a hot must-have in every make-up addict's stash. Without a doubt i searched for this item on ebay and found a lot. I instanly fell inlove with this and bought it from a friend who sells this on ebay.
I've been expecting this package to arrive by Wednesday hanging on the reason that i paid the item just last Monday, but to my disappointment it came yesterday morning (saturday). Happy day it was for me while I was eating my breakfast then when my house helper yelled that someone was looking for me, i did not rushed, instead, i calmly walk the isle of our house like a cat-walk model not knowing what arrived. And so to my surprise it was what i expected to come since wednesday. My new Coastal Scents 88 Matte Palette! I wildly ripped the plastic cover off to unveil the package, and yes it was real!

Palette Photographed With Flash

Palette Photographed Without Flash

Likes:
  • colors are highly pigmented and intense
  • very affordable for an 88 color palette
  • eyeshadows are matte (almost all)
  • looked vibrant even without a primer
  • packaging is very nice
  • has a mirror attached on the case
  • has two sponge applicators (i'll show you later how to use them)
  • totally inexpensive
  • does not have that wierd make-up scent
Dislikes:
  • not all are matte (9 colors are shimmer, ithink. Ü)
  • available only through ebay and other online shopping stores
Although not all are matte in this palette, its not really a big deal, for me its even a bonus for getting this palette and a sample for the next palette that you maybe wanna have (the 88 Shimmer Palettes i meant. Ü). You can use the two sponge applicators for highlighting the browbone and the tearducts for that glowing and attractive appearance. Ü
Don't get me wrong but this palette is not that big as you expect. I think each color is like a five-centavo coin in size. But again, its not a downside because the colors in this palette are supper pigmented and intense that with one swish of an eyueshadow brush the color will show! And do avoid dropping this product as the eyeshadows will tend to break easily. So go and get one for yourself, i promise, you won't regret having this! Ü

Total Damage: P1,000.00 (not that bad for an 88 color palette)


Friday, June 11, 2010

Ever Bilena Daily Sunblock Moisturizing Face Cream***

Each of us needs something to protect our face from the sun's damage right? Specially if you're living here in the Philippines (or in any tropical country), the sun's UVA/UVB can easily damage our delicate skin. Good thing that one of Philippines' hottest cosmetic brand decided to formulate a sunscreen that will protect our face from the sun and will moisturize it at the same time. So presenting, Ever Bilena's Daily Sunblock and Moisturizing Face Cream!

Ever Bilena's Daily Sunblock and Moisturizing Face Cream

Ever Bilena Says:
Sunblock for beach only? Now with Ever Bilena's Daily Sunblock and Moisturizing Face Cream that's no longer for beach people only. This ultra sheer cream provides the vitamins to moisturize the skin and UVA/UVB protection to shield the skin from aging UVA rays and won't breakdown in the sun.

Likes:
  • silky feeling
  • contains vitamin E
  • has clean fresh scent
  • non-greasy formula
  • feels super light when worn
  • moisturizes the skin
  • has UVA/UVB protection
  • available locally
  • inexpensive
  • squeeze-bottle contains a lot of product
  • doubles as a make-up base
Dislikes:
  • produces a visible white substance when you sweat (eeeww).
  • should not be applied too much as the color of your skin will turn whitish-gray.
I Say:

This sunblock is pretty satisfying to me, i mean, it does make me feel as if i'm protected from the sun's harmful rays. the formula is non-greasy and it feels very light when worn. It contains vitamin E for extra conditioning which makes our faces healthy and glowing. It has this clean fresh scent that my friends cannot tolerate (while i can), well the scent is just so addictive, hahaha! When applied on my face, i feel the silky feeling that it promised to give me. After i applied this, putting my powder foundation or pressed powder is a breeze, i mean, it just glides like cottony heaven on my face, which lead me to saying that this product is good enough for a make-up base. But really, i recommend this product to you guys out there, specially if your up to saving money like me. Let's give this a try shall we? This does its job wonderfully! Ü

Total Damage: P100.00 (see? its not that bad! Ü)


Wednesday, June 9, 2010

E.L.F. Blending Brush***

Here's a question for all of you ladies out there, If your gonna do an FOTD, what is the most important tool that one should use? (tentenenen...) A BLENDING BRUSH!!! hahaha
Blending brush is just as important as an eyeshadow brush, this piece of baby makes the eye-look softer and softer as you desire to. This brush is used to soften harsh edges and blend colors well from light to dark for that perfect look. Any make-up enthusiast or beginner can make their work appear professional looking. So in this post, I'll be introducing you to my favorite blending brush. Presenting my new fave, E.L.F.'s Blending Brush! Ü


ELF's Blending Brush
ELF Says: (from eyeslipsface.com)

Expertly blends multiple eye shades while softening dramatic edges and fine lines. Brush can also multitask – use it to set powder or liquid concealer.

All e.l.f. professional makeup brushes have been designed and tested by professional makeup artist Scott Vincent Borba. Each brush has been ergonomically designed to fit perfectly into your hand and facilitate a flawless finish with every application. closer look at the brush's head

Likes:
  • hair is soft and not scratchy
  • classy pearl-white handle
  • very easy to wash
  • can fit in my small make-up kit
  • blends out colors well
  • softens out harsh edges
  • doubles as eyeshadow brush
  • very affordable
  • available locally
Dislikes:
  • nothing much to be disappointed with, except it bleeds but just a little bit but it does its job wonderfully. As a mater of fact, i'm having this as one of my favorite eyebrush (even xteeener from youtube does).
My Say:

This brush is a piece of love for me. I mean, I can totally have this brush and forget that i own a lot of eyebrushes (lols, just kidding! Ü). Having this brush is a must for me being a make-up brush addict. Whenever i do eye-looks, they appear to be professional looking though i know i'm still a baby about make-up and stuff (but i'll keep on learning though Ü). This brush is very soft (compared to its first version that SUCKS as it scratches the eyes! hahaha! Ü). And for its price, you don't have the right to complain because its worth your buck. Ü

Total Damage: P129.00


St. Ives Make-up Remover And Facial Cleanser***

Wearing make-up makes us girls feel cool and beautiful (right ladies? Ü). But not washing after wearing them is soo not cool, specially when break-outs takes place (agree? Ü) which makes our pretty faces into a pretty bad damaged beauty. So as for me, i started looking for a product that can protect me from that threat-for-beauty, and so i found this: Presenting my make-up remover and facial cleanser (talking about hitting two birds with one stone right?) from St. Ives!

St. Ives Make-up Remover and Facial Cleanser

St. Ives Says:
This cleanser effortlessly removes even the heaviest make-up while cleaning the skin.

Likes:
  • removes make-up effectively
  • very affordable
  • has a very nice scent (Calming Chamomile)
  • doubles as a facial cleanser
  • non-irritating
  • dermatologist tested
  • does not contain animal ingredients
  • formulated without parabens and phthalates
  • feels very light and clean when used
  • a pea-size of this product cleans my whole-face
  • the squeeze-bottle contains a lot of product (170g)
  • locally available
Dislikes:
  • nothing to hate at all except that i just wished it was like a facial foam cleanser so that i can feel the deep cleaning essence (char Ü). But no biggie, it still cleans my face really good (it even cleans my blackheads away. Ü)
My Say About This Product:

From reading those lines above, you might get an idea how i am prettily impressed with this product and so I really recommend this product for all of you guys out there. This is a must have in your facial/skin care line to protect your face from obtaining break-outs, pimples and acnes. This is a very good make-up cleaner specially for make-up enthusiasts and beginners like me. So go ahead and get this one, this product might ran out of stock.

Directions on How to Use:
  • wash your face first with warm water (not hot guys, just warm hehehe Ü) then squirt a pea-sized amount of product on your hand, then starting from your T-zone, massage the product all through-out the entire face. Finally rinse the product off the face to get that fresh and clean face.
Total Damage: P155.oo at your nearest department stores


Wednesday, May 26, 2010

ConCeaLer RouTiNe***

Concealers as we all know plays a very big role in make-up nowadays as it hides our dark areas as highlights our entire face as well. There are a lot of types of concealers out there but the main focus for this post is on how to apply them. So i'll be showing you my routine in applying my concealer.

Revlon Colorstay Concealer in Medium/Deep Tone

I prefer to use cream concealers because its very easy to apply and most of all its very easy to blend away for that natural look.

You'll have a choice of your own on what material you'll use to perform this process, you can have it either by a concealer brush, a sponge, or by your own ring finger (I use my finger if i do it on myself because its so much easy Ü).

Concealer Brush and a Sponge

How To Use Your Concealer Brush:
  • As we all know you must use a very clean brush. You don't want to get acne or pimples for this right? hehehe
  • place the right amount that you desire in your dark under-eyes (if you have one Ü).
  • gently blend away the concealer to make it look natural, but still focusing on your darkness.
  • also, don't forget to apply around the redness of the side part of your nose and the redness on the sides and under your mouth area.
  • then gently pat the brush to blend and secure the concealer on the eyes.
  • finally, set the concealer with loose powder to prevent it from slipping off your under-eyes.
How To Use Your Sponge:
  • Use a disposable sponge for this method, because if you don't then you'll get pimples due to the bacterias trapped on the sponge.
  • start by applying the right amount or concealer around your eye area. Also, apply on the sides of the nose and on the sides and under of the mouth as well.
  • begin to blend the concealer by patting the sponge around the areas where it needs coverage. Make it look natural.
  • Set the concealer by patting on loose powder.
How To Use Your Ring Finger:
  • Start off by a very clean finger. You already know the consequences right? hehehe
  • then apply the right amount of concealer on your under-eyes, nose, and mouth.
  • start blending off by patting the concealer using your ring finger. Remember to be gentle specially around your eyes to prevent wrinkles and pre-mature sagging.
  • set by patting on loose powder.
comment if you have the same way of applying concealer as i do! Ü

Friday, May 21, 2010

FoUnDaTiOn MeThOdS***

This post will be all about the methods i've learned for applying my foundation. I actually started learning this from make-up guru's that i watch ever since i started doing make-up. And so i'll be sharing what i knew to all of you.

Lets start with the most basic one...

the what i call " Sponge Method ":

disposable sponges

this method is often used by a lot of beginners for make-up, even by some of the make-up artist cannot lose this method. For me this is the very first method of foundation application.

How i do it:
  • first i wash the sponges to make sure they're clean and safe to use.
  • then i dip the sponge in a glass of water. This way the sponge will absorb less product so it won't be wasted.
  • then i dot the 4 main parts of my face, the forehead, nose, chin and the cheeks.
  • after which, i blend the foundation evenly by dotting it all over my face. Apply more if desired, but not too much as it will cast a ghostly appearance.
  • after the face go on to your neck for a more natural and even look.
Likes:
  • this method gives me a more natural look because i can control the amount of foundation that i will be applying on my face.
  • good for everyday look if applied properly.
  • does not cake the foundation
  • makes it easy to apply my foundation.
  • gives my face that light-weight feeling as if i'm just wearing sunblock.
Dislikes:
  • burns out money because you have to buy another pack of sponges if you used all your sponges. That's why its disposable because you need to throw it away after using (for hygiene purposes).
  • if you don't soak the sponge with water, it will surely sip all the foundation that you're supposed to put on your face. (well i guess the sponge needs it more than you do, hehehe)
  • you really need tome to work on blending more because some sponges are too tiny like the triangular-shaped ones.

Next will the " Foundation Brush Method ":

Foundation Brushes

I really love this method because this evens out my foundation evenly using criss-cross motions. The brush for this method is like flat and square-shaped, this will help distributing and the foundation all over the face and blending it in a breeze. I have observed that a lot of make-up artists uses this method, even Michelle Phan is a fan of this foundation method as she uses this in almost all of her tutorials. This way of applying liquid foundie is a delight for me.

How i do it:
  • i pour a pea-sized amount on the back part of my hand.
  • then i dip this brush on the foundation that i have just poured in my hand.
  • apply on the 4 main parts of the face.
  • start distributing the product on your face by using the criss-cross motion to avoid streak marks.
  • after your done distributing, blend the foundation for an even coverage and a more natural look.
  • go on for your neck area for that natural and even skin tone
  • apply more if desired but not too much.
Likes:
  • very easy way to apply foundation
  • does not waste a lot of product compared with the sponge method
  • creates a more natural look
  • does not cake the foundation
  • does not cost much
Dislikes:
  • gives off streak marks if not used well. But if in case of streak mark emergency, use the sponge and dab it all over to blur the foundation and make the streak marks disappear.

Finally we have the " Stippling Method ":

Stippling brush

Stippling method is one of the most amazing way to apply foundation because it gives an amazing result, an air-brushed effect if i may say so. No doubts this is my favorite among all but its just that it takes time to perform this method if you want that amazing result. But still this method does wonders to every make-up artists and make-up enthusiast.

How i do it:
  • pour a pea-sized amount of foundation at the back of your hand as always. (This warms the foundation and will make it easier for you to apply it on your face)
  • swirl the stippling brush on the foundation with a generous amount.
  • then start stippling the brush from your cheeks and spread the foundation all over the face but still so the stippling method. This will make the "staying power (is that what you call that? Ü)" of your foundation longer.
  • blend by stippling from the face until the neck area for that even and natural look.
  • apply more i desired, but again, not too much.
Likes:
  • lengthens the staying power of the foundation
  • creates an air-brushed effect it used well
  • does not cake the foundation
  • perfect for clubbing or parties and other events
Dislikes:
  • takes time to perform this method

Overall, whatever you do to apply foundation, either by stipling, by sponge, or by a foundation brush, do it, but just remember that you have to obtain that natural and flawless look always. Never apply too much foundation as if your wearing a mask (except for Halloween Ü) because it hides your real beauty. I remembered someone say, "Make-up is not to hide your real face to look beautiful, but rather, it is to show your real face and make it look beautiful."

Thursday, May 20, 2010

HaViE's NeW OuTFiT***

Last week a local mall had their midnight sale, and so me and my mom decided to be a part of that great opportunity. As we were walking around the mall, i was twisting my head 360degrees (as if i could do that, hahaha) for something that i could use for school, but my eyes were caught by these items, a dog's shoes and a shirt (or maybe a jacket hehehe). So for this blog i give you my haul for Havie!

I got the items for a really really low price (for the shirt P350 and for the shoes P200) because of their midnight sale.
Havie seems happy with what she wears, i mean no offense but we also want to treat them special right? We should love our dogs the way we love our family.


Look! she's even bragging her new outfit with Odin (our Labrador). They're the best buddies in our home. Every afternoon we give them time to go out and play together. They're so sweet when they're playing, but if its time for their meal its time for them to be separated, i mean this chihuahua is so darn selfish for food (hahaha).

After i dressed havie with fer new outfit, my mom was really entertained watching her. Even our neighbors drop by to say hello and bid goodbye after watching him walking around our grounds.
Because my mom was so pleased with what she saw, She asked me to get more outfits for havie, well, i can't say no if it will be the reason for this cutie to look cute! Ü


Tuesday, May 11, 2010

HoW I cLeAn My BrUsHeS***

Ü!! Warning - Picture Loaded Post!! Ü

Cleaning our brushes is one major factor in make-up that we shouldn't forget to do, this action is a must for us make-up lovers and addicts. However, there are people who tend to overlook on this issue not knowing what will be the effects of this. Not cleaning your brush is just the same as not cleaning your face, because the bacteria that has been in that brush will be on your face the next time you'll be using it (and i swear you don't like to have breakouts, pimples and acnes all over your gorgeous face, so minus points for our guys out there right? Ü ). Actually i got the way i clean my brushes from some of my favorite make-up gurus in youtube. So in this post i will be sharing you my way of cleaning my brushes. Ü

Things you'll need:
Hair shampoo, Olive oil, Honey Shampoo
and a little bowl
and a spare make-up (non-latex) sponge

How i do it:
(Ingredients mixing)

-pour half a tablespoon of olive oil (this ingredient moisturizes the brush)
- (optional) add a tablespoon of honey and vitamin rich shampoo (this nourishes
the hair of the brushes as it contains honey and vitamin E which is also good
for the skin)
- now pour a tablespoon of your hair shampoo (this cleans and sanitizes the brush)
-after everything has been poured its time to mix all of them.
-this is how it should look (very much like a soup. Ü)

(Time for the Brushes to get cleaned!!! Ü)


  • first things first! wet the brushes to get rid or make-up residues or particles.

  • step two, dip the dirty brushes on the little bowl where our mixture for cleaning is at.

  • step three is swiping it against the hand in a circular motion. doing it this way, the brush will absorb the cleanser to also clean and kill the bacterias and germs that built their homes inside.
- as for the eye brushes (which includes the concealer brush), use the spare non-latex make-up brush to do this step.

  • the fourth step would be rinsing off the shampoo from your brushes. This will take way the germs and bacterias that had their build-up in the hard-to-reach areas inside the brush. Thus, will give you a fresher and cleaner brush to use.
  • the fifth and final step is drying. After i have just rinsed it i take off the excess water by swiping the wet brush in a circular motion on a piece of cloth or a dry towel. Then i'll leave laying on a top of a table with it's head hanging out for airdrying.
Tips:
  • never leave your brushes standing up after washing as the water will soften the glue that binds the hair to the ferrule and handle making your brush hair separated from its body.
  • be gentle when your washing this to avoid shedding.
  • to make the drying time short, leave the brushes the way i did but with a turned-on electric fan in front of it.
  • always know that synthetic brushes dries longer than natural hair. Natural hair dries quickly compared to the synthetic ones.
  • never give a try on blow-drying your brushes, i swear you'll never like the result like i do.


Monday, May 10, 2010

mAyBeLLiNe's WaTeRsHiNe 3D CoLLaGeN LiPsTiCk***


as what i've been mentioning from my previous reviews on products, i said that i'm not really a fan for lip products but i admit that i'm a sucker for face products like foundation base, liquid foundations, pressed powders, etc.. ok lets move on with this, to cut this short, i wanna introduce you to another lippie of mine. Presenting my Maybelline Watershine 3D Collagen Lipstick!


Likes:
  • gives my lips that lucious color
  • feels refreshing on my lips
  • does not feel heavy on me
  • don't need to apply lip balm anymore (but i still do)
  • has a lot of color to choose from
  • contains smooth natural oils for easy application
  • has collagen which is another addiction factor for this
  • very affordable (priced reasonably)
  • locally available
  • moisturizes my lips more than any lipstick that i've got
  • this product reminds me of maybelline watershine diomond lipstick
  • can stay longer if applied properly
Dislikes:
  • nothing much... maybe is just that as what i said before "i'm not a lippie addict" Ü


Tips:
  • to make the lip color last longer, pat a little bit of powder/foundation on your lips, apply your lipstick then blot with a tissue to set everything, then finally reapply you lipstick and top with your lipgloss. That way the color will last longer.
  • for this kind of lipstick that maybelline made, you don't have the problem to choose the right shade for you anymore! pick one color and its already the best for you!
  • i would prefer using a lip brush for this as a brush will give the lips the most perfect coverages (even the ones between the "bumpy" part of your lips)
  • close the cover well after using if you dont want your kit to use the lipstick more than you do (swatches on your make-up kit galore!). Ü